Sergal Base Setup Guide

Information for quick setup and troubleshooting
tapping the Gallium3D logo returns to top of the page

Buy On Gumroad

Table Of Contents

Assets Required For Upload

Without these the avatar  Will Not work or look right
 (e.g. Floating Hair )

Recommended 
Assets Packages
&
Software

These are optional asset packages that
 I use and think you should too
  • Pumkin's Avatar Tools 
     Github or VCC   (Unity Plugin/Addon)
  • Gesture Manager (Unity Plugin/Addon)
  • Blender 3.6.9 LTS (Software)
  • Adobe Substance Painter 9.0.0+ 
    (Software)
  • Adobe Photoshop (Software) Or PSD compatible program

Blender Plugins For Proper Export 

  • Blender 3.6.9 LTS  Version Used
  • Gret
    Github and Releases 
    A blender plugin suite that includes the one function we need, Apply Shape Keys with modifiers.

    A final step before exporting the FBX file into your scene.
    This allows us to export with the Edge Split Modifier and maintain sharp edges with Normals set to Calculate in Unity's FBX importer.

    Having Breasts and a Flat Chest all in one FBX causes shading issues due to some an annoying lack of Shape Key normals / smoothing group data Blender's FBX Exporter Lacks.

Unity Project Creation (VCC)

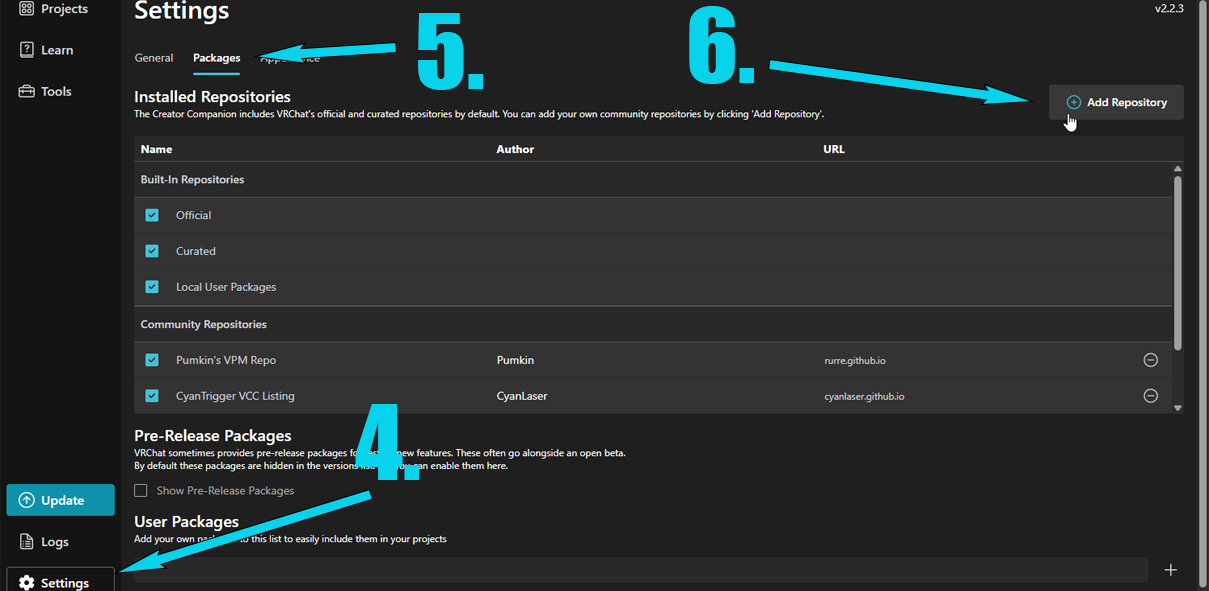
VRChat docs have guides on VCC that will be of greater depth and are more up to date than the guide here:

 VRC VCC DOCS

  • After Launching VCC for the first time click on "Create New Project"
  • Choose "Unity 2022 Avatars" Pick any name and directory
    Then "Create Project"
  • Add packages for use by clicking the "+" symbol.
  • If you already have all the .unitypackage files listed below you may skip the "Quick Setup in Unity (TL;DR)" Section
    • VRC Fury (1.762.0 or above)
    • Poiyomi Toon Shader (poi_Toon_9.0.45 or above)
    • Sergal Avatar Package (Hi)

    Enable "Gesture Manager".
    If you don't have the packages listed above we need to add them in next section.
  • Click the "Settings" button at the bottom left and navigate to the "Packages Tab" Then Click on "Add Repository" Then add the repo URLs for 
    • VRCFury https://vcc.vrcfury.com
    • Pumkin's Avatar Tools https://rurre.github.io/vpm/
    • Poiyomi Toon Shader
      https://poiyomi.github.io/vpm/
      This Version of the toon shader isn't being updated for some reason outdated  and broken as of writing this use poi_Toon_9.0.45.unitypackageUpdate 3/30/24 It's updated now and the VCC version can be used
      from their discord #free-shader channel instead, just click and drag it into your Unity project asset folder after opening the unity project later on
    • Import anything else that uses a VCC repo; now is good time to add those here as well.
  • This is what your packages should look like in your New Project. Click "Open Project" on the top right (The red minus sign means package is enabled)

Quick Setup in Unity (TL;DR)

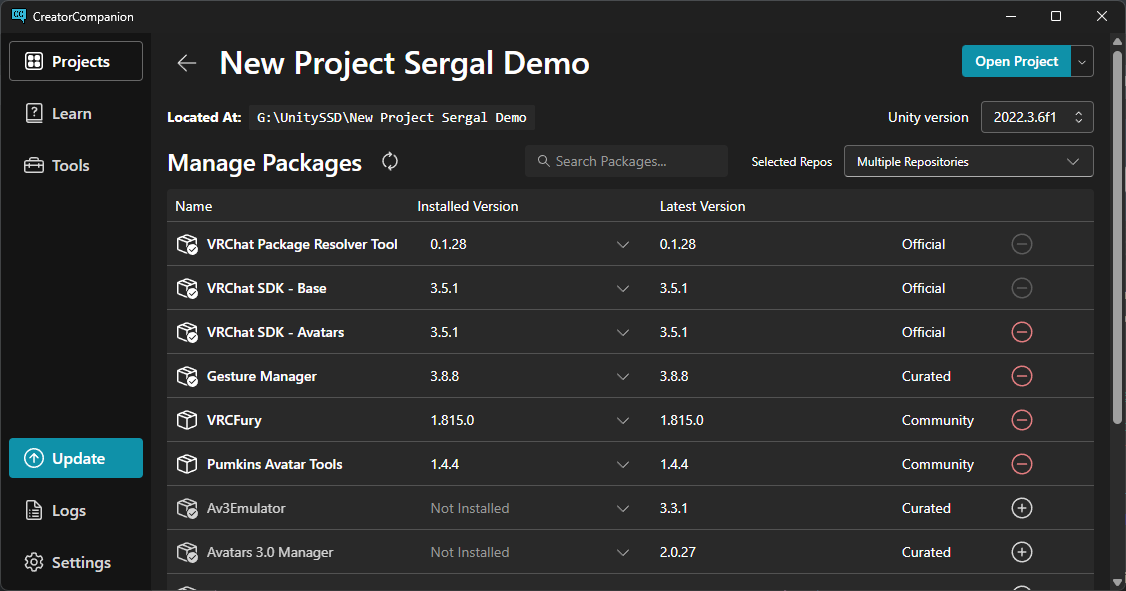
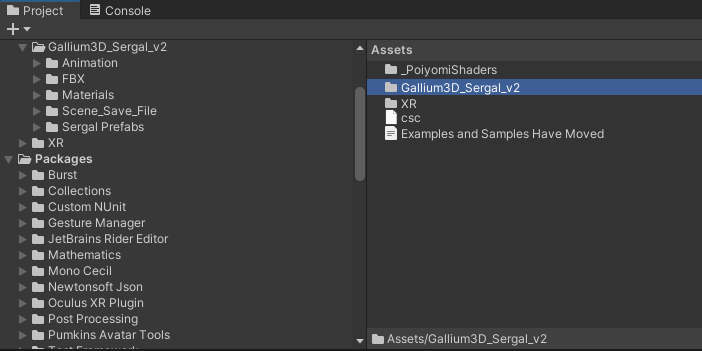
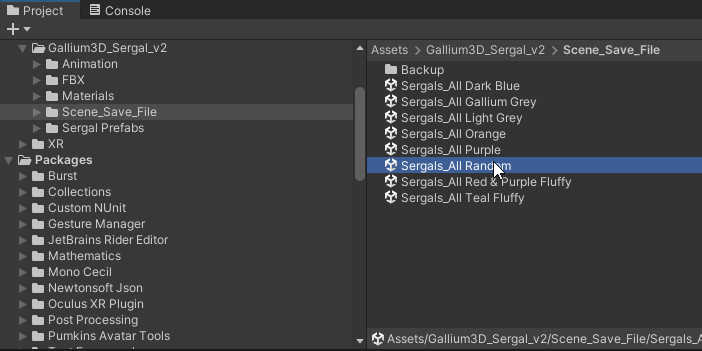
Setup is simple and quick out of the box just open up the provided scene files and upload.

  • You Must import VRCFury (If you haven't already) and Poiyomi First!
    Either install through VCC or Have the packages below

  • You should see an empty unity project you may now import the Sergal package by dragging it into the asset folder only after you have VRCFury and Poiyomi in your project.

  • Once Imported your Assets folder should look something like this

  • Navigate to the scenes "Scene_Save_File" Folder

  • Pick any scene file in this folder and double click. It should load in a few seconds and show a scene of ready to upload Sergal Avatar Variations.
    Explore them all to find your favorite preset.

    A few thumbnails PNGs are provided in the Gumroad Package!
  • From here you can open the VRChat Upload Control Panel.

    Sign in and head over to the builder Tab, pick a Thumbnail or Capture and name the Avatar and upload any version of your choice by agreeing to VRC terms
  • Out of the box all uploadable avatars are Medium performance rank and VRCFury Merges all the animation layers into optimized blend-trees.

    Thanks and have fun!

Customizing Within VRChat
(In game avatar Settings)

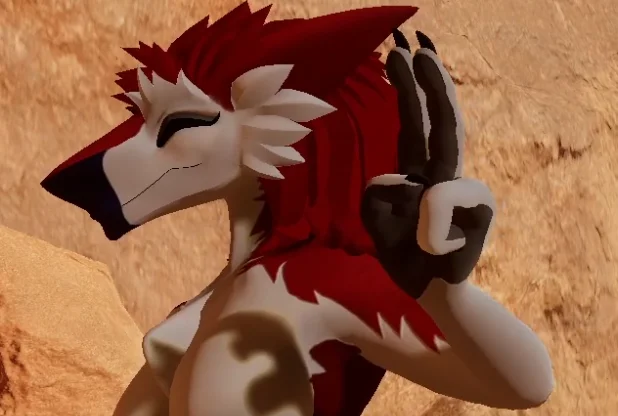
Nearly all body blendshapes can be controlled in game from within the action menu.
all these settings are saved between worlds and only reset when the "Reset Avatar" option is used.
In the next section I will cover how to choose new default parameters the will become your Avatar's default starting out settings

Customizing Settings In Unity
(New Default Expression Parameters) 

Editing VRChat Expression parameters with new default values so you don't have to edit your settings each time you reset your avatar.
(This is optional and not needed to use the avatar as is; this section requires some Unity and VRC SDK Knowledge)

Above example we turn breasts off for all the Feminine Avatars Prefabs
(e.g. Sergal_Base_Classic_F).
In the above video, we select one of two expression parameter files
(VRCSergalParameters_FeminineDefaults) and change the BreastScaler Float Value Default to 0.
In the video below do we this in the Animation Controller Parameters tab
(Sergal FX Controller_FeminineDefaults) as well so your changes will display in Play Mode.

TL;DR
If you only edit the VRC expression parameters your changes will only be apparent in VRChat or within Gesture Manager if you use Play Mode heavily I recommend inputting your custom parameters in both files (controller and expression parameters)
 
Using Gesture manager will allow you to test your settings in editor before uploading 

Notes

(all example videos have VRCFury off to enter Play Mode quicker yours will take longer
note the floating hair that happens VRCFury , it would upload fine even if turned off for Play Mode under tools/vrcfury/settings
The hair uses VRCFury's Armature link to parent to head)

(Outside of Play Mode the BlendShapes of the feminine preset are set manually on the "Body" mesh to make it easier preview the initial presets in editor these are instantly overridden by the animation controller and or by parameters you set above during Play Mode / Upload / Gesture Manager)

Parameters Cheat Sheet

Default value 0  for INTs , Floats, and False for Bools below is a cheat sheet for what value ties to what action menu setting.
  • FaceStyleINT
    1.Steep 2.Droop 3.Boxy
  • PhysiqueINT
    1.Voluptuous 2.Thin 3.Chubby
  • BreastScaler
    0.0-1.0 Scale 0.0 OFF 0.1+ is On
  • ThighScaler
    0.0-1.0 Scale Higher is Larger
  • ShoulderScaler
    0.0-1.0 Scale Higher is Smaller
  • ChestScale
    0.0-1.0 Scale Higher is Smaller
  • ThighWidthScaler
    0.0-1.0 Scale Higher is Larger
  • FloatSnootLength
    0.0-1.0 Scale Higher is Shorter
  • KeelToggle
    0 or 1 Toggle. 0 is OFF
  • KeelThick
    0 or 1 Toggle. 0 is Larger
  • Chin_Style_1
    0 or 1 Toggle. 0 is OFF
  • Chin_Style_2
    0 or 1 Toggle. 0 is OFF
  • SnootSharpness
    0.0-1.0 Scale. Higher More Sharp
  • LowerJawScale
    0.0-1.0 Scale. Higher Reduces
  • HeadVerticalScale
    0.0-1.0 Scale. Higher Less Tall
  • FaceSnootHeight
    0.0-1.0 Scale Higher Reduces
  • Eyes Lower
    0.0-1.0 Scale Higher Lowers
  • EyesLarge (Toggle Bool)
    0 or 1 Toggle. 1 is Larger
  • EyesSmaller (Float)
    0.0-1.0 Scale Higher is Smaller
  • WaistWidth
    0.0-1.0 Scale Higher is Smaller
  • EyelashToggle
    0 or 1 Toggle 1 is On
  • TailFloofStyle_1
    0.0-1.0 Scale Higher is Smaller
  • TailFloofStyle_2
    0.0-1.0 Scale Higher is Smaller
  • TailFloof_Width
    0.0-1.0 Scale Higher is Smaller
  • Tail_Puppet_V
  • Tail_Puppet_H
  • NeckFluff
    0 or 1 Toggle. 1 is On
  • ShoulderFluff
    0 or 1 Toggle. 1 is Off
  • ChestFluff
    0 or 1 Toggle. 1 is On
  • Toe_Puppet_V
  • Toe_Puppet_H
  • TiredLevel
    0.0-1.0 Scale Higher is Greater
  • ChestFluffScale
    0.0-1.0 Scale Higher is Greater
  • ShoulderFluffScale
    0.0-1.0 Scale Higher is Greater

Substance Painter
(Scene & Export Settings)

Project Uses Substance Painter 9.0.0
Red Folders are base textures and filters such as body shading and linear gradients and base white fill layer.
Purple Folders are patterns and parts like for the eyelids, face, and mouth textures
Orange Folders are body fur patterns like the fluffy and classic fur patterns in various colors
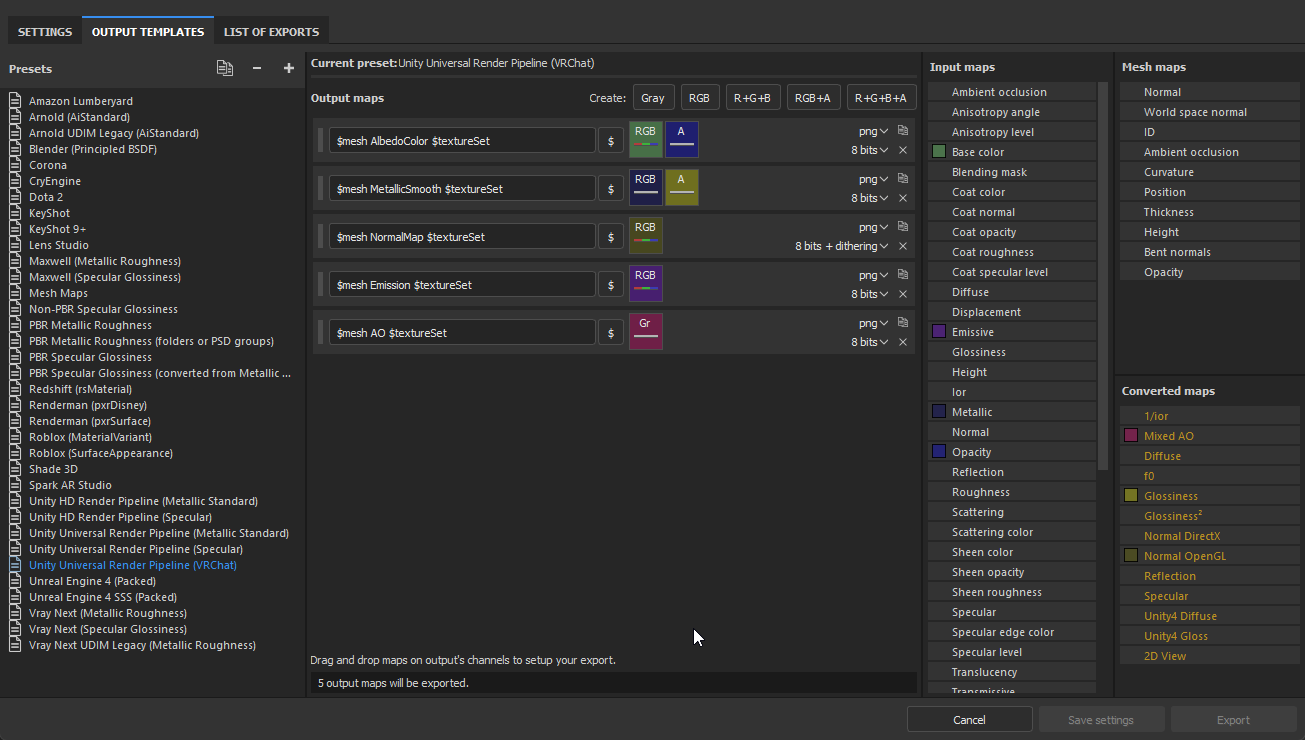
Export 
Screenshot of Output template based off of Unity URP Preset

Be sure to change the export directory to a folder that exists by default it may be saving to a non existent directory.

Padding and resolution varies and not all texture maps are used
Body Material 4096x4096 Padding 32/Infinite
Eye Material 512x512 Padding 16
Hair Material 1024x1024 Padding 16
Tail Material 512x512 Padding 16

Unity Import Settings

FBX  file should have  weld vertices unchecked and normals set to calculate.
This is important due to edge split being applied on export to maintain sharps this is what allows for proper shading 

Body Material Albedo should have a max size set to 4096px and high quality compression
Every other material can be 2048px or lower using also high quality compression

Ensure weld vertices is off for proper shading

Blender Export Settings

Make sure everything in your scene is selected you may overwrite the FBX file directly within your unity project.
Remember to backup your old FBX / Unity Scene and Ensure no objects are hidden with within your blender scene during the export.

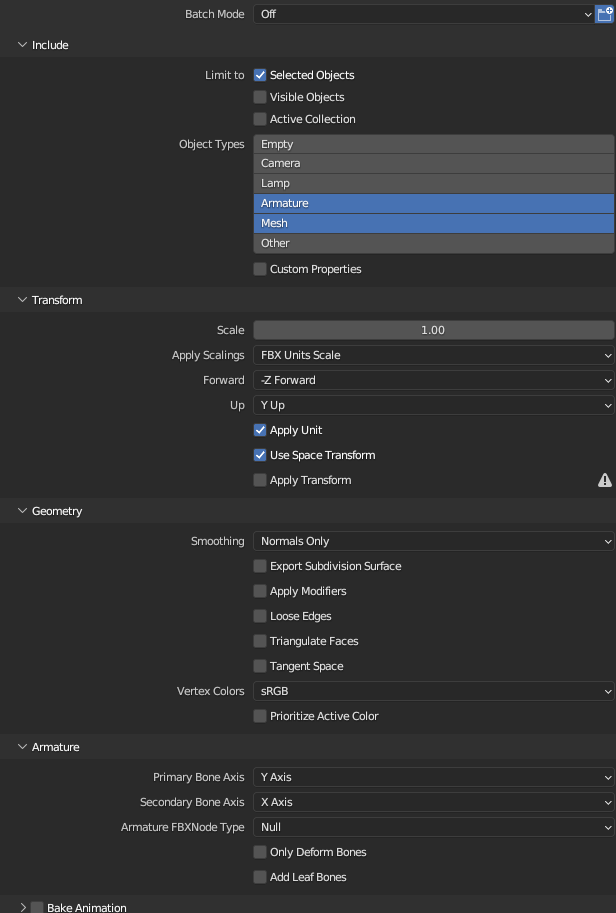
You can save this as a preset to save time

Blend Project EdgeSplit Undo

This project has had Edge Split applied on sharps to every mesh to prevent shading issues mentioned earlier.
This can make editing the mesh a bit tricky without heavy use of proportional editing.
Here is how to merge stuff back together.

Coming soon is a blend file without edge split on the body mesh for now here is how to do it yourself.

I recommend using merge by distance With [0.0001m and Sharps Checkbox Active] with the entire body except the tail
Because the tail fluff faces are doubled preventing blackface culling and "Merge By Distance" will merge it back together

This can be repeated with all the hair mesh objects.